- This topic has 2 replies, 3 voices, and was last updated September 29, 2013 at 8:48 am by Pat McDonald.
-
AuthorPosts
-
September 28, 2013 at 3:16 pm #1056528
I decided to upgrade the switches to the jingle players as the LED tact switches were out of my store for breadboard prototypes and a bit on the small side (easy to trigger the wrong player). I managed to get some “broadcast grade” ones with green LED, although not as good as the old style ones what fitted into a round panel and were secured by a nut (these have been getting hard to find since the late 90s, I found a while back a note from my old work back then where the Meridian TV engineers were asking me where to get a replacement (I did find it and it wasn’t cheap or easy to get quickly!)


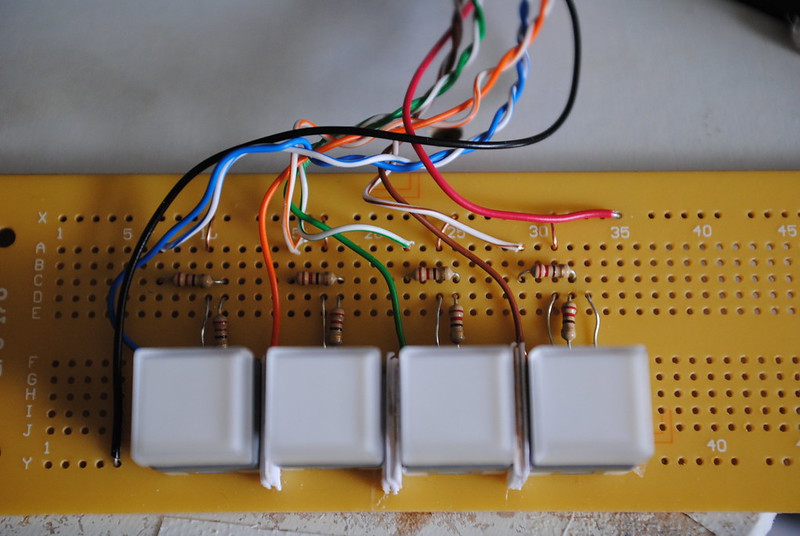
but those big brass tags (for old legacy telecoms kit that switches more current than digital stuff which just connects a small voltage to ground) are 2.54mm wide, so I had to drill extra holes in the perfboard (which is annoying as I’m not that good at this sort of fine work (as you can clearly see below) , which is why I use circuit board with holes already drillled in it!

then the wiring, and series resistors for LEDs and link to the +12v studio battery and ground are added. The resistors (2 x 220 R to give 440 R for 20mA forward current of a 3.2V green LED at 12V) are in the cathode circuit, as that the other end goes to an open collector output of a VM110 board, which is also supplied with +12 battery. I thought this was strange but that was how the Dutch guy who wrote the software advised to wiring up the switching panels and it sort of makes sense, perhaps because the switch inputs are normally pulled up and are activated by earthing them (connecting to 0v).
red and black are studio battery 12 and 0v
as I have a lot of offcuts of network cable from work, this is used as follows.. the white/tracer or the pair is the LED feed, and the solid colour is the switch. Switches 1-4 are wired using the usual order of blue, orange, green and brown.
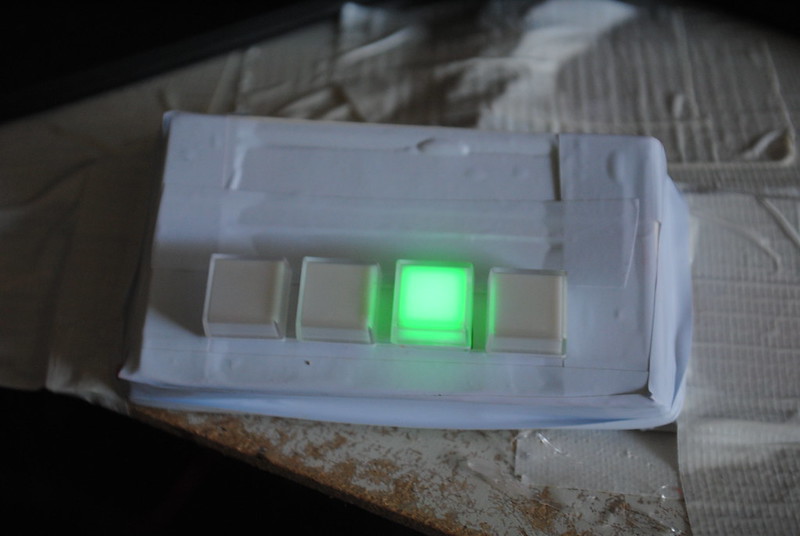
now in a DIY box made from a plastic tub, some laminated paper from a safety sign I made that got cut wrongly, insulating tape and gaffer tape – one day I will make a better one but I am no carpenter, and wanted to get this working quickly as I’m going to a party at the housing co-op tonight (maybe someone there might be able to do a better job of it)

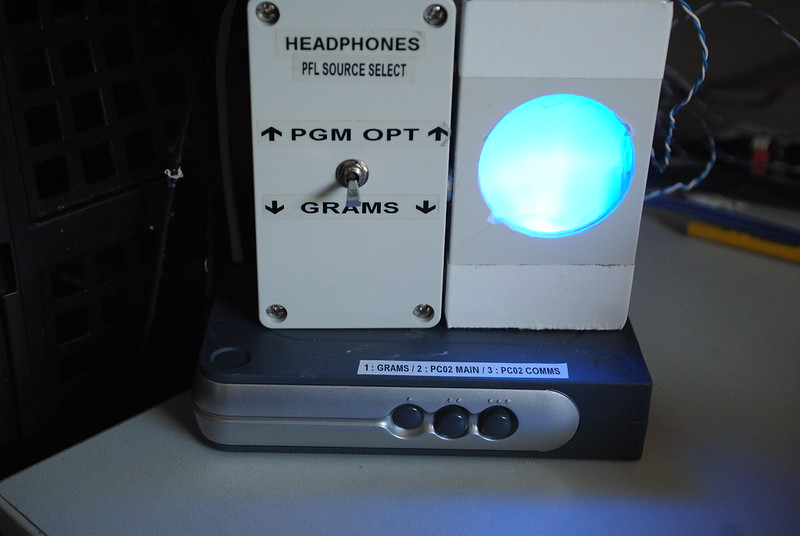
I also recovered another plastic box and translucent plastic to make an opal for the PFL switcher and LED otherwise the LED’s glare in my eyes. Below it is another switcher, this is so I can listen to my main PC sound or VOIP comms through cans without turning on all the studio equipment (such as if it is late at night or early in the morning when I check my emails etc before work)

and finally a better headphone socket, as I had to remove an old nurse call point at work and it had a decent German back box on it
 September 28, 2013 at 10:53 pm #1275813
Some tips for neater hole drilling;-
1) Clamp the board to a disposable piece of wood to keep it steady with G-clamps or similar;-
2) Make a dent in the centre spot of each hole with a centre punch or awl. Getting that first cut right is half the battle.
3) Make a small pilot hole with very fine drill bit first (optional, depends on your drill bit collection).
4) For board, don’t use maximum speed on drill, use a slower speed (more torque, again getting the initial cut right).
5) Tidy up hole afterwards with a round needle file. <- beware of cutting tracks but as you get better this becomes less necessary.
September 29, 2013 at 8:48 am #1275812He he drill.
-
AuthorPosts
- You must be logged in to reply to this topic.
